 |
| My 30+ year old Mini-MOS keyer, still going strong. |
One problem with this callsign on a straight key was the succession of dits. Getting all those dits out in the suffix would wear out my arm. Although I tried a bit of SSB operation on my Heathkit SB-301/401 combo, my primary mode of operation was CW, and it took a while before I ventured much outside the familiar confines of the Novice bands. Since my code speed was already up to about 15 wpm, it was time to upgrade to a keyer.
I ordered a Ham-Key HK-1 set of paddles, but I figured I could build a keyer. I remembered an article in 73 Magazine about a CMOS keyer, and there was even a followup with some improvements. The Mini-MOS keyer was still pretty new technology in 1979. Finding the CMOS parts turned out to be a challenge. My local parts stores didn't have all the exact parts, particularly the CMOS gates. However, they did have 74C equivalents.
Since I didn't need the sidetone generator (my rig already had that), and the character-spacing completion circuit seemed overkill at the time, I re-designed the circuit to use the parts I could find. I did use the dual D-type flip-flop input for the paddles to keep the paddle common at chassis ground. I ended up using two 4013, two 74C02, two 74C08 an a 4020.
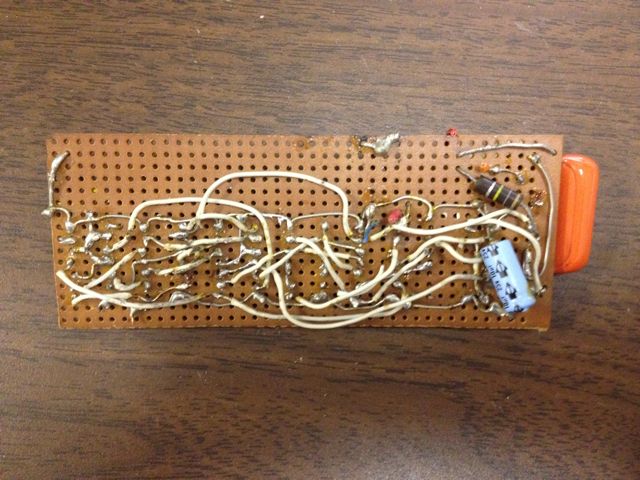 |
| The original 3-D wiring of the Mini-MOS. |
This keyer worked great. I used it with the Heathkit SB-301/401 combo, later with a borrowed Yaesu FT-101EE, and even with a DX-60B. When I bought the Kenwood TS-430S in 1985, it was the first rig without grid-block keying, so I had to remove the keying transistor and key it directly from the CMOS gates. The CMOS chips lived up to the low power consumption -- the battery lasts for basically it's shelf-life. Over 30 years, I've probably replaced that battery eight or nine times.
I even built one of these keyers for my brother Ben, NJ8J. For his unit, I used wire-wrap construction, rather than go through the 3-D wire sculpture routine again.
This keyer worked great until last fall, when I couldn't get it to work. After a bit of troubleshooting, I concluded that the 3-D wiring had finally given up the ghost, so I decided to rebuild it using wire-wrap construction.
 |
| The old board just floated in the metal box. The new board is held in place with two screws and spacers. |
I actually prefer a 3M product that uses IDC (insulation-displacement connections) over wire-wrap, but, unfortunately, this product wasn't that popular with 3M, and I don't know if you can buy it any more.
Having plenty of wire-wrap sockets and tools, I pulled out the 30+ year old wiring diagram and re-created the circuitry. This process did not take more than about an hour. Plug the chips in, connect the battery, and ... it doesn't work.
By now I was beginning to doubt of the 30+ year old chips were still functioning, that somehow a stray static charge had blown out one of the gates. A bit of troubleshooting shows that the master oscillator isn't oscillating. Maybe the 74C02's are bad? I put them into a protoboard and checked them out. Heh, even with no connections, the gates are oscillating at around 2 MHz. (This is why you always need to tie unused inputs to ground or Vdd). A bit of work with a few resistors and an LED proves the 74C02 works just fine. OK, why won't it oscillate?
Debugging this was slow work, and I wasn't making progress -- which is why I eventually ordered the K1EL K12 Keyer board. But even after finishing the K12 Keyer, I still wanted to know what was wrong with the Mini-MOS.
Several weeks later, I finally got the oscillator to go. However, the speeds were all wrong. Trying to adjust the speed range I found the oscillator would quit. A bit more work I discovered the underlying cause: my 30+ year old wiring diagram had an error in it. Yes, one of the resistors was shown connecting to the wrong junction. When the resistance got below a certain point, there wasn't enough hysteresis to trigger the oscillator and it would quit. Easily fixed by moving one wire. Oh, and, of course, I corrected the wiring diagram.
The keyer works again like it always did. I hope it lasts another 30 years. I want to try it out with the 40m Novice Transmitter.

