Showing posts with label Keyer. Show all posts

Monday, May 28, 2018

WinKeyer 3 Serial

The finished product.
What's the use of having an excellent soldering station like the Hakko FK-888D if you don't have something to build?

I recently splurged about $40 and bought a WinKeyer 3 Serial. This is a very nice little board that has a WinKeyer 3 chip powered solely by the RS-232 signals on the serial port. I figured this would end all the timing problems I have with keying the rig from a serial port RTS line.

I would have preferred to buy the similar WinKeyer USB Lite, but unfortunately, that product has been discontinued. I suspect it may be because the Lite cut into the sales of the more expensive WKUSB-SMT.

The WK3 Serial Kit.
The kit arrived in a little plastic pouch. There's no manual, but there's a little slip of paper with a URL to download a manual. Not a problem. I just parked one of my computers on the workbench to read the instructions.

Assembly went quickly. I actually ended up following the steps out of order. I guess I should pay better attention, as the first part I assembled was the IC socket. I skipped assembling the resistors and diodes. Oops.

I quickly realized my error and went back and assembled all those parts. This is not a Heathkit. It's more like "insert all the resistors, solder, insert all the diodes, solder, insert all the capacitors, solder" type of kit.

Flip side of the kit. Not
many parts in this one.
For me, this was a piece of cake. Given how simple this kit is, it wouldn't be hard for a much less experienced kit builder. I elected not use use the speed potentiometer at the moment.

Once assembled, testing is a matter of hooking it up to a Windows machine and using a test application.

K1EL provides two programs: WKtest and WK3demo. The WK3 Serial Kit manual has a link to WKtest, although this appears to be an older application. WK3demo is the preferred application to use, at least according to the web site. I tried both, and they both worked.

This kit fired up and worked right after assembly, so no troubleshooting was necessary. I could easily program CW text to flash the on-board LED. Perhaps the hardest issue I had was figuring out exactly which USB Serial device I had hooked it up to.

Now that it's assembled and tested, I'll need to find a suitable box to mount it in, and wire up connectors to hook it to the rig. I didn't manage to complete this before the WPX CW contest, so perhaps next time.

Tuesday, February 28, 2017

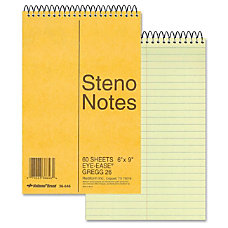
The Station Notebook

When I originally set up my station as a novice, I didn't make a lot of notes. I wrote a few things on the back-side of my logbook pages: radios I used, antennas I put up. But, for the most part, I freely made changes to my setup without a lot of documentation.

Some years later, I had a small steno-style notebook lying around, and I used it to record certain information. Like the exact color-code of the RS-232 cables I wired up for my computer. That sort of thing was handy to have written down, because it saved a lot of reverse-engineering later I went to make another cable. But that was about it.

Perhaps a dozen years ago, I read a couple of articles about James Lawson, W2PV, and how he kept copious notebooks about his station. He even solved a sticky problem during a contest, because he kept notes about his antenna installation.

After that, I started writing more things down in my little Steno notebook. Most of it was changes I made to the station -- radios or antenna modifications. Or if something big happened -- like I blew up the amplifier. I recorded a lot more details, and I put dates on everything.

But when I began to spend most of my time out in Floyd County it put my little steno notebook out of reach. I had a new station and I still wanted to keep notes. My solution was dead simple -- I created a text document using TextEdit. I called it Floyd County Station Log.

Looking at it today, it's more like a diary. Each month, I put in a new heading: March 2017. And below that I record anything interesting that I do. I record the things that work, and I also record the things that don't work! If I don't do anything that month, I'll just change the heading to the next month.

The bottom of this document has a list of projects to be worked on. Silly now, since I'm no longer at that QTH: 6m antenna, K9AY controller, 20m and 30m traps for the dipole, tribander-Moxon  times 3 (now that's an interesting project I'll need to write about some day!), remote antenna switch, etc.

This method worked so well, in May 2015, I adopted it for my main station log. Not only did I make new entries, but I also entered all the data from the steno notebook. Plus, I went back through all of my contest comment submissions and recorded all the changes I had made to the station from November 1994 to date.

Today the Gwinnett County Station Log is a reasonably complete record of all the things I've done with the station for the last 22+ years. It has six pages of project notes at the end. Lots of stuff to work on! And, yes, I also have a smaller document for the Walton County Station Log.

I guess my point is that having a station notebook is extremely valuable. It doesn't matter if you use a small steno notebook, a spiral-bound notebook, a composition book with graph paper, a loose-leaf notebook, or a computer document. The important thing is to find a style that works for you to keep notes. After a while, there's just too much to try to remember. So keep good notes.


Thursday, November 24, 2016

Rethinking the Station Desk

Recently, the water supply line to my Gwinnett house had to be replaced, and that meant I had to clear out my station operating desk so the plumbers could work. With everything moved out from that end of the room, it was the perfect time to re-think the station desk.

Truth is, I had been thinking about this for the past year. Ever since I moved back from Floyd county, I had considered making some changes. Some of this was based on my experiences with the Micro-shack.

Let's start with the desk. In 1985, I bought a 30" solid-core door and placed it over a couple of two-drawer file cabinets. Over thirty years and two moves later, that's what I'm still using. The door has stood the test of time. I originally stained it and coated with polyurethane. When I moved to Gwinnett county eight years later, I sanded it down again and gave it a fresh coat of polyurethane. More than 20 years later, it was again time.

I also made one modification I should have done from the start. I took a router and a 1/4" radius bit and rounded off the top edge of the door. For years, the sharp edge of the door had been cutting into my arms as I rested them on the edge while contesting. The gentler radius prevents that entirely. With a fresh coat of polyurethane, it feels quite smooth.

The two-drawer file cabinets were cheap and provide ample support -- although one of them has to be pushed back pretty far to support the back end of the desk, and thus you can't really use the top drawer to store anything. But the biggest drawback is the height. The resulting tabletop is 30 and 1/4" above the floor -- just a little bit high. In contrast, the Micro-shack desk was closer to 29" above the floor. A much more comfortable height.

I've considered moving the filing cabinets out and replacing them with a 2x4 frame to support the weight of the desk to get a more optima height. I may still do that.

Back nearly thirty years ago, I built a shelving hutch that sits on the desk, holding the equipment on three levels. Made from 12x1 lumber, it's not quite as square as I'd like, but I wasn't much of a craftsman thirty years ago, either.

Back then, I purposely made a shelf about an inch off the desk, and that's where the equipment goes. The space underneath was intended to allow logbooks and other operating aides to be stored, out of the way. I haven't used paper logbooks in a decade now. I did just fine in Floyd County with radios right on the operating desk. If I did again, the shelving hutch would have the first compartments on the desk directly.

Another thing that has changed is space for a computer. Thirty years ago (and yes, I did have computers thirty years ago), the computer was off to the side, and 90 degrees to the operating desk. Today, I almost exclusively use laptop computers. Using a computer is integral to radio contesting, and a lot of my DX chasing. And one side effect of having bifocals is not to have the monitor too high off the desk -- otherwise I end up leaning my head back uncomfortably far.

Any new shelving hutch would have space front and center to slide in a 15-inch laptop or a keyboard and monitor. With room on the right (and left) for radios.

Certainly something to think about.


Sunday, January 12, 2014

Straight Key Night 2014

Homebrew Transmitter and Receiver, ready for another
go at Straight Key Night in 2014
Last year, Straight Key Night (SKN) was kind of a bust for me. As I wrote then, I ran into trouble trying to key my 35+ year old electronic keyer to key the 40m "Novice" rig. This year, I got to operate SKN with no problems.

Despite having an entire year to figure it out, I left fixing the keyer to the last minute. Back in the summer, I had modified the keyer to use a 2N3906 to key the gate of a BS170. However, when I hooked it up to the rig, it wouldn't key -- oscillator problems again. It went back to the project shelf to be figured out later.

At some point, I took the keyer back to Gwinnett county to try to troubleshoot it there. But as fate would have it, I didn't have time to figure it out. Right before Christmas, I brought it back to Floyd county.

A bit of work with the mini-scope proved that the oscillator wasn't firing at all. It took a while until I found the source of the problem: one of the wires to the speed potentiometer had broken off, so the RC circuit was broken. Without it, there's no phase delay, and therefore, no oscillation.

Built in 1979, Mini-MOS keyer provides yeoman service again.
Great! This means I just hook it up to the rig and go right? Wrong. It appeared to work for a few seconds, but then it would continuously key. It was erratic. Troubleshooting it a bit more, and it seemed to work -- the keying signal would get to the gate of the BS170, but not beyond. At one point I thought maybe I had a bad MOSFET, so I pulled the BS170 out. (In the process, I ended up destroying the part - oops)

Pulled a 2N7000 out of the junk box. The 2N7000 and BS170 are pretty much the same part, although the pin-outs are different. Hook it up and it seems to be working great. I can see the keying on the gate on the 'scope, and the transmitter is happy. Unplug the scope probe, put the lid on, and ... it's locking up again.

Hmm. Take the lid off, put the probe on, and it works again. On a hunch, I pulled a 100k resistor out of the junk box and put it across the gate to ground. Working -- even with the probe removed. Ah ha! That's the problem. The gate of the 2N7000 (or BS170) wasn't being pulled back down to ground, so the floating leakage from the 2N3906 was just barely enough to keep it turned on. Adding the scope probe brought in just enough resistance (a few megaohms), to overcome that leakage.

All ready to go. After dining out with a church group on New Year's Eve, I managed to work seven stations all before the ball fell. Of course, I told them that I was cheating, using a 35+ year old keyer instead of a straight key. No one seemed to mind. I did find that my 7061.1 kHz crystal stopped working. Worked one more person on New Year's Day for a total of eight.

A great way to bring in the new year. I guess I'll submit mine as a check log....

Wednesday, January 9, 2013

Straight Key NOT!

Since I was thinking about Straight Key Night before, you might anticipate I would have an extensive operating report of the Homebrew 40m Transmitter and Receiver. Well, not exactly....

I did go and review the rules. There are no prohibitions against using electronic keyers. Indeed, the guidelines state "This 24-hour event is not a contest; rather it is a day dedicated to celebrating our CW heritage." I certainly consider my nearly 34-year-old Mini-MOS keyer part of my CW heritage.

So, that was my plan -- to cheat on Straight Key Night and use my keyer. 

I was busy during New Year's Eve, so I went out on the morning of New Year's Day and hooked up the keyer to the 40m Transmitter. With the spotting function, it appeared to work. The keying was a little soft, but I was able to find my transmitting frequency with ease. I tried two or three crystals, and then I noticed the oscillator wasn't stopping. If I unplugged the keyer and plugged it back in, I could send one element, and then it would stick on. Then it stopped working altogether.

At this point, I was sort of in a panic. I pulled the cover off the keyer and looked inside. What I saw next set me back a moment -- there was no battery in the keyer! I had been using the keyer solely on the stored power in the electrolytic capacitor for about five minutes. Now that is a low-power station accessory!

I scrounged up a 9 volt battery and verified that I had not fried the 30+ year old CMOS chips. However, it appeared that the CMOS gates had enough leakage that it would not reliably cut off the 6CL6 oscillator. 

The original Mini-MOS design keyed through a PNP transistor in order to work with grid-block keyed rigs -- with a negative keying voltage. That worked great with my SB-401 and later with a DX-60B and the FT-101E that I borrowed. When I bought a Kenwood TS-430S in 1985, it had a positive keying voltage. I simply removed the PNP transistor and connected the keying line directly to the CMOS 74C02. Since it worked, I kept using it.

I think the original problem was there are no free gates in the seven chips that make up the keyer. In order to drive a NPN transistor or enhancement-mode FET to key the transmitter, the keying sense has to be reversed -- instead of bringing a positive voltage to ground, we need to go from ground to a positive voltage for the base / gate of the transistor. In retrospect, it would have been easier to have left the PNP transistor in place, use it to drive an NPN transistor or  FET.

A quick look in the junk box revealed some 2N7000s -- an excellent enhancement-mode FET to key the transmitter. (The K1EL keyers use this same device) I just need to dig up a PNP and some resistors. Ah, a project for another day.

Oh, and what about Straight Key Night? Well, since I had just gotten the K3 going, I decided to play with it instead of SKN. I ended up working DX spots on 12 and 17m, including working VP2MRV on RTTY using the K3's FSK D CW to RTTY mode. Cool.

SKN? Maybe next year....

Tuesday, December 25, 2012

Thinking Ahead to Straight Key Night

These two rigs sit in my shack all year, but I really only use them on new year's day. I'm talking about my home brew Novice Transmitter and Receiver.

Practically speaking, the transmitter isn't terribly useful. Being crystal controlled, you can't hunt around the band and answer someone -- you must call CQ. And it only covers 40m. 40m is a great band, but not everything happens there.

The receiver would be more practical to use -- it's a pretty nice superhet, with a narrow CW filter. But, really, it's designed for use with the transmitter, so it too, sits idle on the shelf.

2013 will be the seventh year I've operated Straight Key Night with this transmitter. Frankly, I'm considering cheating. Instead of using my old Japanese J-38-style clone, I'm thinking of using the Mini-MOS keyer. The whole idea of Straight Key Night is to return to our roots. Why not use this over venerable equipment? I also wonder how the transmitter will sound being keyed electronically, instead of mechanically.

If I do end up using the keyer, I'll have to disqualify myself.

Saturday, May 19, 2012

Rebuilding the Ancient Mini-MOS Keyer

My 30+ year old Mini-MOS keyer, still going strong.
Back in 1979, before Volunteer Examiners, FCC testing sessions were hard to find outside of major cities. My Novice license had lapsed, so I took the opportunity at the Jackson's Mill, WV hamfest and sat for the General class exam. Much to the surprise of the examiners, I passed and was soon in possession of N8BHE.

One problem with this callsign on a straight key was the succession of dits. Getting all those dits out in the suffix would wear out my arm. Although I tried a bit of SSB operation on my Heathkit SB-301/401 combo, my primary mode of operation was CW, and it took a while before I ventured much outside the familiar confines of the Novice bands. Since my code speed was already up to about 15 wpm, it was time to upgrade to a keyer.

I ordered a Ham-Key HK-1 set of paddles, but I figured I could build a keyer. I remembered an article in 73 Magazine about a CMOS keyer, and there was even a followup with some improvements. The Mini-MOS keyer was still pretty new technology in 1979. Finding the CMOS parts turned out to be a challenge. My local parts stores didn't have all the exact parts, particularly the CMOS gates. However, they did have 74C equivalents.

Since I didn't need the sidetone generator (my rig already had that), and the character-spacing completion circuit seemed overkill at the time, I re-designed the circuit to use the parts I could find. I did use the dual D-type flip-flop input for the paddles to keep the paddle common at chassis ground. I ended up using two 4013, two 74C02, two 74C08 an a 4020.

The original 3-D wiring of the Mini-MOS.
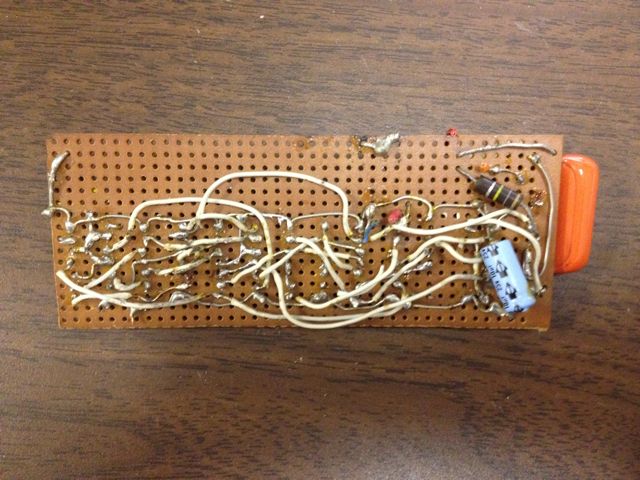
Oddly enough, I don't have a schematic for this keyer. I never drew one. Somehow, I did the re-design on the fly. The original keyer was constructed with a bit of 0.1-inch perfboard, solder-tail sockets and some 22 gauge wire. I did draw a wiring diagram that I still have. (More on this in a moment) It's amazing this thing worked at all -- those tiny bare wires so close to each other, kept from shorting out only by careful bending into a three-dimensional structure.

This keyer worked great. I used it with the Heathkit SB-301/401 combo, later with a borrowed Yaesu FT-101EE, and even with a DX-60B. When I bought the Kenwood TS-430S in 1985, it was the first rig without grid-block keying, so I had to remove the keying transistor and key it directly from the CMOS gates. The CMOS chips lived up to the low power consumption -- the battery lasts for basically it's shelf-life. Over 30 years, I've probably replaced that battery eight or nine times.

I even built one of these keyers for my brother Ben, NJ8J. For his unit, I used wire-wrap construction, rather than go through the 3-D wire sculpture routine again.

This keyer worked great until last fall, when I couldn't get it to work. After a bit of troubleshooting, I concluded that the 3-D wiring had finally given up the ghost, so I decided to rebuild it using wire-wrap construction.

The old board just floated in the metal box. The new
board is held in place with two screws and spacers.
The keyer I made for my brother Ben was my first exposure to wire-wrap, but certainly not my last. In 1983 I designed and built (with the help of a classmate) a new 6809 CPU board for an old Southwest Technical Products (SWTPc) 6800 computer. I've also designed and built a couple of floppy disk controllers and other boards using this type of construction. (And that's probably plenty of material for another article)

I actually prefer a 3M product that uses IDC (insulation-displacement connections) over wire-wrap, but, unfortunately, this product wasn't that popular with 3M, and I don't know if you can buy it any more.

Having plenty of wire-wrap sockets and tools, I pulled out the 30+ year old wiring diagram and re-created the circuitry. This process did not take more than about an hour. Plug the chips in, connect the battery, and ... it doesn't work.

By now I was beginning to doubt of the 30+ year old chips were still functioning, that somehow a stray static charge had blown out one of the gates. A bit of troubleshooting shows that the master oscillator isn't oscillating. Maybe the 74C02's are bad? I put them into a protoboard and checked them out. Heh, even with no connections, the gates are oscillating at around 2 MHz. (This is why you always need to tie unused inputs to ground or Vdd). A bit of work with a few resistors and an LED proves the 74C02 works just fine. OK, why won't it oscillate?

Debugging this was slow work, and I wasn't making progress -- which is why I eventually ordered the K1EL K12 Keyer board. But even after finishing the K12 Keyer, I still wanted to know what was wrong with the Mini-MOS.

Several weeks later, I finally got the oscillator to go. However, the speeds were all wrong. Trying to adjust the speed range I found the oscillator would quit. A bit more work I discovered the underlying cause: my 30+ year old wiring diagram had an error in it. Yes, one of the resistors was shown connecting to the wrong junction. When the resistance got below a certain point, there wasn't enough hysteresis to trigger the oscillator and it would quit. Easily fixed by moving one wire. Oh, and, of course, I corrected the wiring diagram.

The keyer works again like it always did. I hope it lasts another 30 years. I want to try it out with the 40m Novice Transmitter.


Thursday, April 5, 2012

K1EL K12 Keyer

Finished K1EL Keyer with Ancient HamKey
HK-1 Iambic paddles.
My 30+ year old CMOS Keyer gave up the ghost -- the point-to-point wiring apparently was suffering from a failure. I tried re-building it using wire-wrap, but the troubleshooting was taking too long. I figured I needed to quickly build a replacement keyer that I can use right now with my TS430S.

I remembered that Curtiss used to make a keyer chip. But a quick search found that the original Curtiss devices were no longer available, although MFJ purchased the rights and offers a slightly updated chip.

Honestly, at the time I looked at this, the chip was $45, which seemed way more than I wanted to spend on a "temporary" keyer. A bit more searching brought me to K1EL's web page.

K12-BAT kit, as it comes from K1EL.
K1EL offers a number of interesting devices and components. The WinKeyer I had heard of -- but frankly, the name put me off slightly, as I've been a long-time Macintosh fan. Imagine my surprise to discover there's nothing "Windows" about the WinKeyer. It looks like a superior product for providing CW keying facilities in a contest station.

But that would be a project for another day. Today, I just needed a simple keyer. And I found it. The K1EL K12 keyer chip filled the bill nicely, and had 6 programmable memories and a host of other features to boot. All for less than $10!

Even better, there was a kit -- only $17. I quickly ordered the K12-BAT and within the week had the package pictured above.

There's not even two dozen components.
There's not a whole lot to the kit -- printed circuit board, socket and chip, transistor, battery holder, and a handful of resistors and capacitors. This would not be a bad first kit for someone. For me, it took less than 30 minutes to assemble.

Finished circuit board.
Once assembled, I wired up the paddles and tried it out. The command structure takes a bit of getting used to -- it's hard to remember for some of the longer commands what comes when.

However, it is quite a serviceable keyer. But, I can't just have wires strewn all over the bench. (Well, actually, I can, but that's not how I like to operate) Digging through my junk box I found a used cast aluminum box that might make a decent cabinet. The hard question was -- what to use for the seven pushbutton switches I needed? Nothing I had in the junk box was small enough to fit in the aluminum box.

Wiring was easy.
The upcoming Dalton hamfest provided the answer. If found some surplus switches that were small enough to fit, and they were cheap, so I bought eight. A subminiature potentiometer filled out the required parts list.

Drilling out the enclosure took a more time than building the board. But the wiring was very straightforward.

All done but the hard part.
At this point, I had a functional keyer in a rather ugly enclosure. Finishing the enclosure took more effort. Removing the board switches and pot left me with an empty enclosure. You can see that it had some kind of adhesive on the top, as well as a bit of corrosion here and there.

The best treatment, I've found, for stout aluminum like this is wire brushing. The oxide and other compounds come off easily, and the steel bristles of the wire wheel score the aluminum just enough to give it a nice texture. Best not to do it in a hurry and don't use too much pressure. I did both and ended up with some deep scratches in the top and a wire-brushed left index finger.

Of course, I had to wire brush it again. I painted the enclosure with the same flat black paint I used to repair the R7000. The end result is pretty sweet.

I'm still trying to figure out how to use the K1EL K12 keyer. In trying to program one of the memories, I have found it is very, very sensitive to character timing. I probably need to read the manual again. In any case, I am very happy with the K1EL K12 Keyer kit. I would highly recommend it to anyone who needs a sophisticated, yet inexpensive keyer.


Tuesday, November 16, 2010

Bencher BY-1

"I hate CW!" I heard a voice at a hamfest flea market recently. As I strolled up to his table, he followed up with, "You gotta help me by buying these keys."

I didn't feel like debating the finer points of operating CW with him. I was more interested in what was on the table: three sets of keyer paddles. The first was a a Heathkit HD-1410, which I knew to have a reputation for horrible feel. One other was a single-lever paddle, which I had no interest in. The third looked to be a Bencher BY-1.

I generally go to a flea market with a list of all the different things I'm looking for. I didn't this time, but I did remember I was looking for an inexpensive set of keyer paddles. The Bencher looked like it might fit the bill.

Back in 1979, when I was licensed as N8BHE, I found the progression of dits in my call difficult to send, so I opted to upgrade from a straight key to an electronic keyer. I bought a Ham-Key iambic paddle and built my own CMOS keyer. Now, the Ham-Key isn't the greatest paddle design. The base isn't quite heavy enough, the paddle arms pivot on large pins, which leaves some slop in the feel. But in 1979, it was only $30, and I've been using that same unit for 31 years.

I figure it is about time to get a second set of paddles. If you look around, you'll find they are not cheap.  There are none you can buy for less than $50, and most of them are well over $100. The item on my list read "cheap paddles." That meant finding something used, hopefully in reasonable shape.

I had used a Bencher before, back in 1980 in the Georgia Tech club station W4AQL. I remember my first experience touching those paddles. I slapped the handles so hard the armature came off the pivot. I suppose you have to use a more delicate touch than with the Ham-Key.... But I did have some success using it. This fellow had this unit marked $20. I offered him $10, then $12, and finally we agreed on $15.

As I walked away from the table with my purchase, another fellow suggested I tear the unit down completely and clean it, and it should work great. That's just what I had in mind.

Once I got home, I put the Bencher on the workbench. It was far grimier than I remembered, with a telltale film of yellow tobacco on the base and armature. During disassembly, I found the hold screws to be hopelessly bent, and one of the screws holding the round armature pedestal nearly impossible to remove. With vice grips I removed it, but this destroyed the head of the screw.

All of the metal hardware went into a small container filled with WD-40, which did a good job of removing the latent grime. I cleaned the base and plastic parts with Windex. This took off the grime, but some of the paint came off as well -- likely due to a long-standing chemical reaction of the dirt with the paint.

No matter, a couple of coats of flat-black spray paint and the base looks good as new. Then the tedious process of putting the components back together. I replaced the four screws that I could not reuse, and quickly re-assembled the unit and adjusted it to suit my fist. I followed the excellent instructions compiled by N1FN here.

The result you see pictured above. It looks great and the feel is good, too. I'm not as ham-fisted as I was back in 1980, so I haven't had any trouble springing the mechanism. The base is way heavier than the Ham-Key, so it doesn't tend to wander as much. I believe I'm really going to enjoy working CW with my Bencher paddles.